Guestbook Template
with separate input mask
First please download the following file and unpack it on your computer. Then upload the files onto your webspace /server.
Download
The zip file contains the following files:
Template for the article:
template/inc_cntpart/Articlesummary/article/guestbook_split_at_en.tmpl
Templates for the content part guestbook:
Template of the input mask for new guestbook entries:
template/inc_cntpart/guestbook/guestbook_split_entry_en.html
Template of the overview of the guestbook entries:
template/inc_cntpart/guestbook/guestbook_split_view_en.html
Every of the templates is also available as GERMAN in the zip file. You can detect the file looking for the suffix DE.
 gb_template_v1.zip
Guestbook Template
zip, 8.4 KB, 05/24/12, 3197 downloads
Einrichtung
 |
| Image 1 - Article Template |
| Image 2 - Content Part 1 |
| Image 3 - Content Part 2 |
 |
| Image 4 - Content Part Overview |
Proceed as follows to include the templates in an existing guestbook:
1. Go to article base information of the guestbook article and choose the template under "article detail" (in this case for English) guestbook_split_at_en.tmpl. Then check "Paginate Content Parts". Click then "Save" to overtake the changes (Image 1).
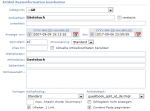
2. Edit the existing content part "Guestbook". Insert "1" at Section and choose "guestbook_split_view_en" at Templates. Click then "Save" to overtake the changes (Image 2).
3. Create a second content part "Guestbook". Insert "2" at Section and choose "guestbook_split_entry_en" at Templates. Furthermore insert the ID of the main guestbook at "Alias ID", in this case it is "2". Click then "Save" to overtake the changes (Image 3).
After saving the changes you should see an overview like on Image 4.
Notice: After writing an entry a cookie will be set. Therefore you will not see an input mask anymore after your first entry because it will be hidden because of the cookie.
If you have questions or need some help please use the Contact form of the website.
Last Changes: Tuesday, 30. October 2007

